How to Remove Mold from Drywall? The 10-Second Press Test

BYSteve Jafari, General ManagerNORTHERN VIRGINIA, MARYLAND & D.C.

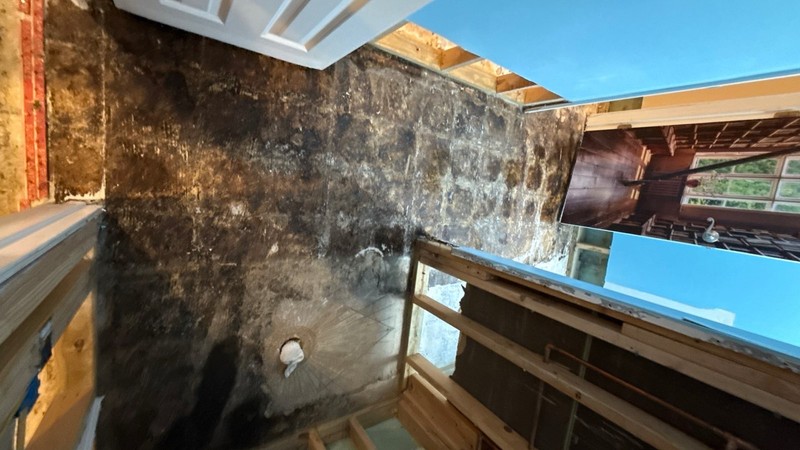
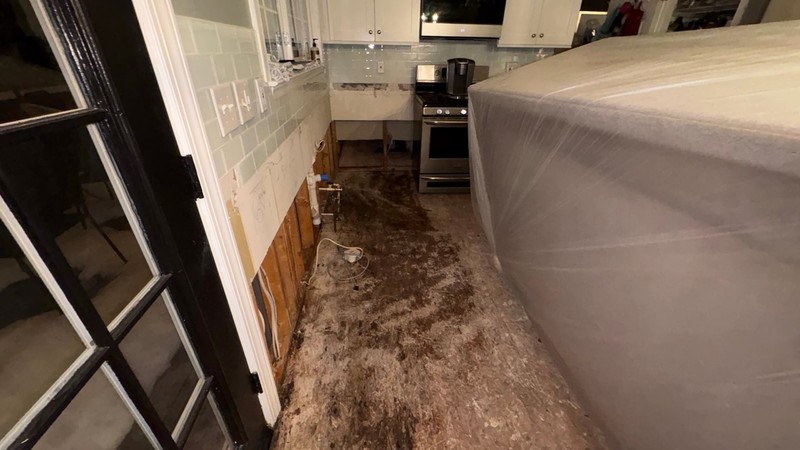
To remove mold from drywall, first run the press test: push firmly on the wall with a gloved hand. If the board is hard and the mold sits only on the paint, you can often wipe the surface growth away with a detergent solution and dry the wall completely. If the drywall is soft, spongy, or crumbling — or staining has bled through the paper facing — the gypsum core is colonized and that section must be cut out and replaced, not cleaned. As a rule of thumb: painted, structurally sound drywall with less than about 10 square feet of surface mold can be cleaned by a careful homeowner; saturated or paper-embedded drywall must be removed under ANSI/IICRC S520-style containment. Either way, the mold will return unless you find and fix the moisture source first, because mold can begin growing on wet drywall within 24 to 48 hours.
Call 1-888-29-FLOODHow do you remove mold from drywall — clean it or cut it?
The answer comes down to one rule: clean it if the drywall is hard and the mold is only on the painted surface, and cut it out if the drywall is soft or the mold has grown into the paper facing and gypsum core. Learning how to remove mold from drywall correctly means deciding between those two paths before you touch a single spray bottle, because the wrong choice either destroys a wall that could have been saved or — far worse — leaves a living colony sealed inside your home.
Drywall is gypsum sandwiched between two layers of paper. That paper is cellulose, which is mold food. Once mold's root-like structures (hyphae) grow past the painted surface and into the paper, you cannot 'clean' it out, because the organism is physically embedded in a porous, absorbent material. Wiping the surface removes the visible cap while the colony survives underneath, ready to bloom again the next time humidity rises.
This is why the industry standard for mold remediation, ANSI/IICRC S520, treats contaminated porous materials differently from non-porous surfaces: non-porous materials can generally be cleaned, while porous materials with actual mold growth are typically removed and discarded. Painted drywall behaves like a semi-porous surface at first, then like a fully porous one once moisture and mold penetrate the paint film. The press test, described below, tells you which situation you're actually in — usually in about ten seconds.

What is the 10-second press test for moldy drywall?
The press test is a quick physical check: put on a glove, press your fingertips firmly against the moldy drywall, and feel how it responds. Firm, solid drywall that doesn't flex means the gypsum core is intact and you're likely dealing with surface mold you can clean. Soft, spongy, bulging, or crumbling drywall means water has degraded the core and mold is inside — that section has to come out.
Do this test at the visible mold and about 12 inches around it in every direction, because colonization spreads beyond what your eye can see. Mold at the baseboard, for example, often hides a taller plume of contamination behind the wall where the cavity stayed damp long after the surface dried.
While you press, use your eyes and nose too. Brown or black staining that has bled through from the back of the drywall, a musty odor that intensifies as you get closer to the wall, or paint that bubbles and lifts are all signs the damage runs deeper than the surface — even if the board still feels firm. If you own a moisture meter, take a reading on the suspect area and compare it against a known-dry wall elsewhere in the house; an elevated reading means active moisture is still present and cleaning alone will not solve anything.
One more caution before you press or probe anything: if your home was built before the 1980s and the wall or ceiling has a textured finish, do not cut or sand it until it has been checked for asbestos-containing materials. Older texture coatings and joint compounds sometimes contain asbestos, and disturbing them creates a hazard entirely separate from the mold.
- Firm board + surface-only mold + no odor bleed-through = candidate for cleaning
- Soft, spongy, or crumbling drywall = cut it out and replace
- Stains bleeding through from behind the board = core is colonized, replace
- Bulging, sagging, or warped drywall = water-damaged, replace
- Musty smell that spikes at the wall = likely hidden growth in the cavity — investigate before cleaning
When can you actually clean mold off drywall?
You can clean mold off drywall only when the board is structurally sound, the affected area is small (generally under about 10 square feet, the commonly cited EPA threshold for DIY cleanup), and the mold is confined to the painted surface. In that scenario the paint film acted as a barrier that kept the mold from rooting into the paper, so removing the surface growth and drying the wall fully can genuinely resolve the problem.
Even then, cleaning is only half the job. Mold grew because moisture was present, so you must find and fix the water source first — a plumbing leak, condensation on a cold exterior wall, a roof drip, or chronically high indoor humidity. If you clean the wall but leave the moisture, the mold returns within days, and each round of regrowth pushes it deeper into the material.
It's also worth understanding what 'clean' actually means here. The goal is physical removal of the mold, not just killing it. Dead mold spores and fragments are still allergenic and can still trigger respiratory symptoms, which is why the S520 approach emphasizes removing contamination rather than simply treating it with chemicals and leaving it in place.
For genuinely small, surface-only spots, homeowners can handle cleaning with proper protection. Anything larger than roughly 10 square feet, anything involving contaminated water (Category 2 or Category 3 under the IICRC S500 water classifications), or any household member with respiratory sensitivity, mold allergies, or a weakened immune system should bring in professional mold remediation rather than disturbing the growth.

How do you clean surface mold off drywall step by step?
To clean surface mold off drywall: protect yourself, isolate the area, fix the moisture source, wipe the mold away with a detergent solution, and then dry the wall completely and verify it stays dry. Work gently — aggressive scrubbing can tear the paint film and open a path into the paper facing, turning a cleanable wall into a replaceable one.
Skip the bleach myth. Household bleach is mostly water, and on a semi-porous surface like painted drywall the water component soaks in while the chlorine stays near the surface and dissipates — so you can lighten the stain, add moisture to the wall, and leave the deeper growth alive. A simple detergent solution physically lifts and removes spores far more effectively, and a dedicated antimicrobial can be applied afterward if desired. Removal beats 'killing' every time.
| Step | What to do | Why it matters |
|---|---|---|
| 1. Protect | Wear an N95 or better respirator, gloves, and eye protection | Disturbing mold releases spores into the air you breathe |
| 2. Contain | Shut off HVAC, close doors, seal vents, and lay plastic to catch debris | Prevents spores from spreading to clean rooms and ductwork |
| 3. Fix the source | Stop the leak or lower indoor humidity below 50% | Mold cannot regrow without moisture |
| 4. Clean | Wipe with a detergent solution, working top to bottom | Physically removes mold rather than just bleaching the color away |
| 5. Dry | Run fans and a dehumidifier until the wall is fully dry | Lingering moisture invites immediate regrowth |
| 6. Verify | Confirm the wall reads dry and no staining or odor returns over the following weeks | Damp readings or returning stains mean the problem isn't solved |
How do you cut out and replace moldy drywall?
To replace moldy drywall, you cut out the contaminated section well past the visible growth, remove and bag it under containment, dry and clean the wall cavity, then install new drywall only after the space is verified dry. This is the required path whenever the press test reveals soft board, paper-embedded mold, or bleed-through staining.
Cut at least 12 to 18 inches beyond the visible edge of the mold, and cut to a clean horizontal line — typically to the center of the nearest stud, or a set height like 2 or 4 feet — so the new board's seams land on solid framing. This is the same logic behind a flood cut after water damage; our guide at /blog/flood-cut-drywall-how-high explains how those cut heights are chosen. Crucially, do not open contaminated drywall without containment: cutting releases a burst of spores into the air. Professionals build sealed plastic containment, run HEPA-filtered negative air pressure, and wear full PPE precisely to keep that plume from spreading through the home.
Behind the removed drywall is the part homeowners most often miss: the wall cavity, framing, and insulation. Wet insulation is porous and is almost always discarded rather than dried — see /blog/wet-insulation-replace-after-water-damage for why. Framing lumber is usually salvageable: it gets HEPA-vacuumed, cleaned, and dried down to a verified moisture target before anything is rebuilt. Only after the cavity is confirmed dry and clean does new drywall go in — otherwise you seal moisture and mold inside the wall and restart the whole cycle behind fresh paint.
Our team follows this sequence on every job, documenting daily moisture logs and photos so you can see for yourself that the cavity was dry before it was closed. You can learn more about our approach on our /services/mold-remediation page.

What safety gear and containment do you need before touching moldy drywall?
Before disturbing moldy drywall you need, at minimum, an N95 respirator (an N100 or half-face respirator with P100 cartridges is better), nitrile gloves, eye protection, and a way to isolate the work area so spores don't travel. Even a small cleaning job stirs spores into the air, and cutting drywall releases dramatically more.
Containment matters because mold spreads through the air, not just along surfaces. A common homeowner mistake is opening up a moldy wall in the middle of the house with the HVAC running, which distributes spores into every room and into the ductwork itself. At a minimum, shut off the HVAC, close interior doors, and seal the doorway and nearby vents with plastic sheeting and tape before you start.
For larger areas, contaminated water, or repeated regrowth, professional containment goes further: sealed plastic barriers with zippered entries, negative air machines exhausting through HEPA filtration, and air scrubbers running throughout the work — the S520-aligned setup that keeps the rest of your home clean while the affected section is removed and the cavity is dried.
- Respirator: N95 minimum; N100 or half-face respirator for cutting and removal
- Nitrile gloves and sealed eye protection (goggles, not glasses)
- Disposable coveralls for larger jobs
- HVAC off and vents sealed to stop spore travel through ductwork
- Plastic sheeting taped over the doorway to isolate the work zone
- Heavy-duty bags sealed inside the containment before debris is carried through the house
What causes mold on drywall, and how do you stop it coming back?
Mold grows on drywall because moisture reached the cellulose paper facing and stayed long enough for spores to germinate — which can begin within 24 to 48 hours of the material getting wet. To stop it from returning, you must eliminate the moisture source, not just the mold; cleaning or replacing drywall without fixing the water is a temporary patch, and often an expensive one to repeat.
The most common sources are plumbing leaks inside walls, roof and window leaks, bathroom humidity with poor ventilation, condensation on cold exterior walls, and water damage from floods or appliance failures that was never fully dried. Condensation deserves special mention: when warm, humid indoor air meets a wall surface cooled below its dew point — common on poorly insulated exterior walls and behind furniture pushed tight against them — moisture condenses invisibly, day after day, until mold appears with no 'leak' anywhere to be found. Category 2 and Category 3 water events under IICRC S500 — appliance discharge, sewage backups, storm intrusion — are especially prone to fast mold growth and generally require removal of affected porous materials rather than cleaning.
Prevention comes down to controlling moisture: keep indoor relative humidity below 50%, ventilate bathrooms and kitchens to the outdoors, fix leaks as soon as they appear, and dry any water intrusion within 24 to 48 hours. Fast, thorough, verified drying is the single best defense against mold on drywall — a proper structural dry-out takes several days of monitored drying with daily moisture readings, not a weekend with a box fan. If you've had a recent leak or flood, see /emergency-water-damage before mold gets a chance to start.

When should you call a professional to remove mold from drywall?
Call a professional when the moldy area is larger than about 10 square feet, when the drywall failed the press test, when the mold came from contaminated water, when it keeps returning after cleaning, or when anyone in the home has asthma, allergies, or a compromised immune system. These situations exceed safe DIY limits, and disturbing the growth without proper containment risks spreading contamination through the entire house.
A professional isn't just cleaning — they're tracing the moisture source, containing the work area, removing colonized materials under HEPA-filtered negative air pressure, drying the cavity to a verified standard, and documenting every step. That documentation matters, because most of our customers end up filing an insurance claim for the underlying water damage. We bill the homeowner directly and hand you documentation you may share with your insurer — an Xactimate scope, CompanyCam photo documentation, and daily moisture logs — so you're fully equipped to work with your insurer. We are hired by the property owner under a written agreement.
Restoration Doctor is licensed, insured, and follows ANSI/IICRC S520 mold remediation protocols across the Virginia, Maryland, and Washington, D.C. tri-state area, with 24/7 emergency response. If you're staring at mold on your drywall and aren't sure whether to clean it or cut it, call 1-888-293-5663 or reach us through /contact and we'll help you make the right call — sometimes a photo and a two-minute conversation is all it takes to know which path you're on.