Water Leak Damage in Washington, DC: What Should You Do First?

BYSteve Jafari, General ManagerNORTHERN VIRGINIA, MARYLAND & D.C.

If you have water leak damage in Washington, DC, the first thing to do is stop the water source, shut off power to affected areas, and call a licensed restoration crew — Restoration Doctor answers 24/7 at 1-888-293-5663 with a median Northern Virginia arrival of 47 minutes. Move belongings out of the water, take photos of everything, and let professionals handle extraction and structural drying to the ANSI/IICRC S500 standard. Fast, verified drying is what prevents a small leak from becoming a mold and rebuild problem — materials still wet past 24 to 48 hours are at risk for mold growth.
Call 1-888-29-FLOODWatch a real Washington, DC upper-floor water leak — ceilings opened to joists, multi-room water intrusion restoration:
Water Damage in Washington DC — Ceilings Opened, Structure Dried to Standard in Five Days
WASHINGTON, DC · UPPER-FLOOR WATER LEAK — CEILINGS OPENED TO JOISTS, MULTI-ROOM WATER INTRUSION · DOCUMENTED ON SITE
What should you do first when you discover water leak damage in your DC home?
Stop the water at its source and shut off electricity to any wet area first — those two actions prevent the damage from spreading and keep you safe. Then call a licensed restoration company so professional extraction can begin before the water wicks deeper into ceilings, walls, and framing. When homeowners ask what to do about water leak damage in Washington, DC, the honest answer is that the first 60 minutes matter more than almost anything you do afterward.
On a recent Washington, DC project, a homeowner discovered a slow supply-line leak on an upper floor that had been running behind a wall long enough to saturate the ceiling below. By the time it was noticed, water had traveled across multiple rooms and was dripping through light fixtures. The homeowner did exactly the right things: shut the water main, cut power to the affected circuits, and called for emergency help. Those decisions kept a bad day from becoming a structural catastrophe.
Water damage is progressive, not static. Clean (Category 1) water degrades toward Category 2 or 3 the longer it sits, drywall loses integrity within hours, and EPA guidance is to dry water-damaged materials within 24 to 48 hours to prevent mold growth. Acting quickly is not about panic — it is about interrupting that timeline before it costs you materials, time, and money.
- Shut off the water source (fixture valve or the main shutoff) to stop new water.
- Turn off power to wet rooms at the breaker — never stand in water near live electricity.
- Call a 24/7 restoration crew for emergency extraction (1-888-293-5663).
- Move furniture, electronics, and valuables out of the water.
- Photograph and video everything before you move or throw anything away.
- Do not use household fans or a shop vac on Category 2 or 3 water — that can spread contamination.

What causes an upper-floor water leak to damage the ceiling below?
Upper-floor leaks damage the ceiling below because gravity pulls water down through the floor cavity, along joists, and into the drywall ceiling of the room underneath. The water follows the path of least resistance — often traveling several feet horizontally along framing before it finds a seam, a light fixture, or a nail hole to drip through. That is why the visible stain rarely sits directly under the actual leak.
In the DC project we mitigated, the source was a pressurized supply line, so water was released continuously rather than as a one-time spill. It saturated the subfloor, ran down the wall cavity, and pooled on top of the ceiling drywall until the drywall could no longer hold the weight. Ceilings that sag, bubble, or show a spreading brown ring are already waterlogged and structurally compromised.
Common causes of these upper-floor leaks include failed supply lines to sinks and toilets, cracked drain lines, overflowing tubs, aging water-heater connections, and HVAC condensate lines in attics or closets. Because the water source is hidden inside the structure, homeowners frequently underestimate how much water has actually accumulated — the ceiling is only showing you a fraction of the problem.
How do professionals extract water and dry the structure after a leak?
Professionals dry a structure through a documented process: assess the water category and class, extract standing and trapped water, strategically open wet cavities, then run engineered air movement and dehumidification until moisture readings return to a verified drying goal. This follows the ANSI/IICRC S500 Standard for Professional Water Damage Restoration, which is the industry benchmark our crews work to on every job.
The process starts with moisture mapping. Using moisture meters and thermal imaging, technicians find where the water actually traveled — behind walls, above ceilings, and under flooring — not just where it is visible. This step is critical, because drying only the visible damage leaves hidden moisture that later feeds mold and rot. After mapping, standing water is extracted and saturated, non-salvageable materials are removed to open the cavity for drying.
Then the psychrometry begins. Air movers accelerate evaporation at wet surfaces while commercial dehumidifiers pull that moisture out of the air, and technicians record temperature, relative humidity, and grains-per-pound (GPP) readings daily to confirm the structure is actually drying rather than just feeling dry. On the DC project, the ceilings were opened to the joists so the framing and floor cavity could be dried directly and verified, instead of being sealed up wet.
- Inspection and moisture mapping with meters and thermal cameras.
- Water category and class determination per IICRC S500.
- Extraction of standing and trapped water.
- Controlled removal of unsalvageable drywall, insulation, and flooring.
- Air movers plus dehumidifiers sized to the affected area.
- Daily moisture monitoring to a documented drying goal before equipment comes out.

Why do restoration crews open the ceiling to the joists?
Crews open a water-damaged ceiling to the joists because wet insulation, trapped water, and saturated framing cannot be dried through intact drywall — the cavity has to be exposed so air movement and dehumidification can reach it directly. It looks dramatic, but controlled demolition is often what saves the rest of the structure from prolonged moisture and mold.
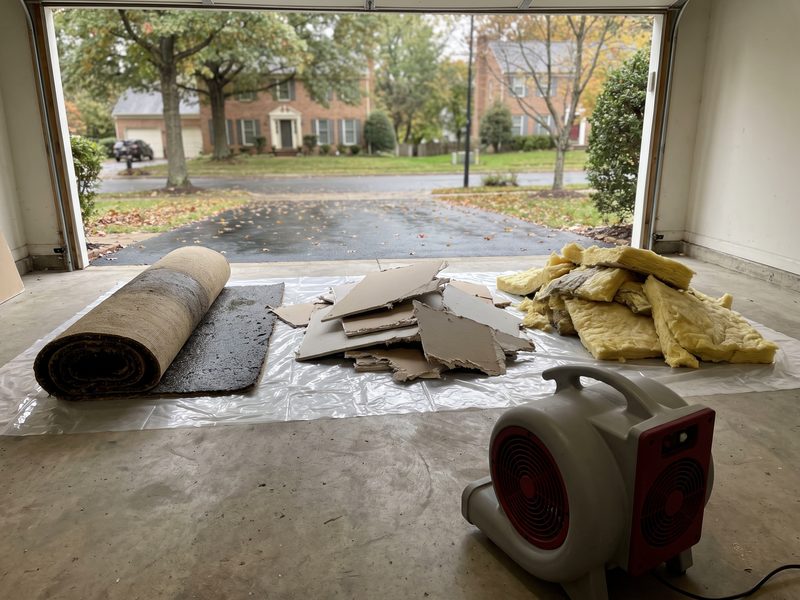
In the Washington, DC project, our crews removed the sagging, saturated ceiling drywall in the affected rooms and pulled the wet insulation out of the cavity. That exposed the joists and subfloor above so technicians could dry the framing to its core, not just its surface. Wet cellulose or fiberglass insulation acts like a sponge — leaving it in place would have trapped moisture against the wood for weeks, creating exactly the conditions that allow mold growth the ANSI/IICRC S520 standard exists to remediate.
Opening the ceiling also lets technicians inspect for hidden damage: mold that was already forming, compromised electrical, or additional leak paths. Everything that is removed is photographed and logged before disposal, so there is a documented reason for each material taken out. That documentation becomes part of the homeowner's claim file, which we will cover below.
How long does drying take and what does water leak restoration cost in DC?
Most structural dry-outs take about 4.5 days, monitored daily to verified drying goals, though a multi-room ceiling leak with saturated framing can run longer. Cost depends on how much water intruded, how many rooms and materials are affected, and how much reconstruction is needed after drying — which is why every credible estimate is a range, not a flat number.
For context, a small, contained single-room leak caught early sits at the lower end of the ranges below, while a multi-room upper-floor leak with ceilings opened to the joists — like the DC project — lands toward the middle or upper end because of extraction volume, demolition, extended drying, and rebuild. Reconstruction (new drywall, insulation, paint, and finishes) is typically scoped and priced separately from the emergency mitigation work.
Restoration Doctor bills the homeowner directly and hands you a carrier-ready claim file, so you are never guessing at what was done or why. About 83% of our customers file an insurance claim, and the documentation we provide is built to support that process from day one.
| Scope | Typical range | Typical timeline |
|---|---|---|
| Emergency water extraction | $500 – $2,500 | Same day |
| Structural drying (per affected area) | $2,000 – $6,000 | About 3–7 days |
| Ceiling/drywall removal & disposal | $1,000 – $4,000 | 1–2 days |
| Multi-room upper-floor leak (mitigation) | $4,000 – $12,000+ | 4–7+ days |
| Reconstruction / finishes | Scoped separately | Varies by finishes |

How does a homeowner-direct claim file support your insurance claim?
A homeowner-direct claim file supports your insurance claim by giving you organized, carrier-ready proof of what happened, what was damaged, and what was done — an Xactimate scope, CompanyCam photo documentation, and daily moisture logs. Because we bill you directly rather than your carrier, our incentive is to work for you: we document thoroughly so you can pursue a fair, fully supported claim.
Insurance adjusters evaluate claims on evidence. When you can hand them a line-item Xactimate estimate (the same estimating platform most carriers use), time-stamped photos of the damage and the drying process, and daily readings proving the structure was dried to standard, you remove the guesswork that leads to disputes and underpayments. On the DC project, every opened ceiling, every removed material, and every moisture reading was logged and dated.
This matters because a leak that is not properly documented can be partially denied — the carrier may question the cause, the scope, or whether the work was even necessary. A complete claim file answers those questions before they are asked. You can learn more about how we structure this on our insurance claims page, and you always remain in control of your own claim.
To be clear: we invoice the homeowner, not the insurance company. You submit our documentation to your carrier, and because it is built to their standards, it strengthens your position rather than leaving you to assemble evidence after the fact. We work for you, not your insurance company.
- Xactimate scope: line-item estimate in the format carriers recognize.
- CompanyCam photos: time-stamped visual proof of damage and drying.
- Daily moisture logs: readings that prove the structure was dried to standard.
- Documented reason for every material removed and every piece of equipment used.
How do you prevent mold after a water leak in Washington, DC?
You prevent mold after a water leak by drying the structure completely and quickly — mold needs moisture, and removing it within the first 24 to 48 hours denies mold the conditions it needs to colonize. DC's humid summers make this even more urgent, because high ambient humidity slows natural drying and keeps materials damp longer.
The single biggest mold risk is a leak that looks dry on the surface but is still wet inside walls, ceilings, and framing. This is exactly why professional drying relies on moisture meters and verified drying goals instead of a visual check. If a cavity is sealed up before it reaches a documented dry reading, mold can grow inside where you cannot see it and only surfaces weeks later as an odor or a stain.
If mold has already started — common with slow leaks that went unnoticed for days or weeks — it must be handled under the ANSI/IICRC S520 mold remediation standard, with proper containment and controlled air management rather than simply wiping it away. If you are unsure whether your leak crossed into mold territory, our mold remediation team can assess it, and our water damage restoration crews build mold prevention into every dry-out.

When should you call a professional versus handle a leak yourself?
Call a professional any time water has reached ceilings, walls, insulation, or framing, or when the water is contaminated (Category 2 or 3) — those situations require extraction and verified drying you cannot achieve with household fans. You can reasonably handle a small, clean spill you catch immediately and dry within hours, but a leak that soaks the structure is not a DIY job.
The problem with the DIY approach on a real leak is that surface drying hides interior moisture. Renting a fan and running it for a day often makes the drywall feel dry while the framing behind it stays wet — which is precisely how mold and wood rot start. Professionals confirm dryness with instruments, not by touch, and dry to a documented standard.
Restoration Doctor responds 24/7 with a 60-minute response SLA across the Northern Virginia core and a median on-site arrival of 47 minutes, and we serve homeowners throughout the Virginia, Maryland, and Washington, D.C. tri-state area with over 10,000 restoration projects completed. If you are looking at a stained, sagging ceiling or water spreading across multiple rooms, call 1-888-293-5663 or reach us through our contact page and let a crew stabilize the situation before it gets worse.
- DIY is reasonable: a small, clean, freshly spilled amount of water dried within hours.
- Call a pro: water in ceilings, walls, insulation, or subfloor.
- Call a pro: any contaminated water, sewage backup, or long-standing leak.
- Call a pro: sagging or bubbling ceilings — those are already structurally compromised.
- Call a pro: any visible mold or musty odor after a leak.