Pipe Leak Behind Shower Wall Signs: A Homeowner's Guide

BYSteve Jafari, General ManagerNORTHERN VIRGINIA, MARYLAND & D.C.

The most common pipe leak behind shower wall signs are loose or hollow-sounding tiles, cracked grout and peeling caulk, a persistent musty odor, discolored or bubbling paint on the adjacent wall, and a spongy floor near the shower. A moisture meter reading well above the dry baseline of the surrounding materials confirms the leak—drywall and framing that stay elevated 48 hours after the last shower point to water inside the wall, not humidity. Because these leaks stay hidden and can feed mold growth within 24–72 hours, shut off the water and call a licensed restoration team the moment you suspect one. Restoration Doctor serves the Virginia, Maryland, and Washington, D.C. area 24/7 at 1-888-293-5663.
Call 1-888-29-FLOODWhat are the signs of a pipe leak behind a shower wall?
The clearest pipe leak behind shower wall signs are tiles that feel loose or sound hollow when tapped, grout that keeps cracking, caulk that peels away no matter how often you replace it, a musty smell that lingers after the bathroom dries, and staining or bubbling paint on the wall directly behind or beside the shower. Any one of these can mean water is escaping a supply line, drain, or valve connection inside the wall cavity and soaking the framing and backer board.
Shower-wall leaks are deceptive because the water rarely appears where it originates. It travels down studs, wicks into drywall, and pools under the subfloor long before you see a drip. That is why homeowners often notice a secondary symptom—a warped baseboard in the next room or a stain on the ceiling below—weeks before they connect it to the shower.
The faster you recognize these signals, the smaller the repair. A leak caught at the caulk-failure stage may only require drying and resealing, while the same leak ignored for a month can rot backer board, delaminate tile, and seed mold across an entire wall cavity. What starts as a targeted fix becomes a demolition-and-rebuild project simply because the water had time to keep moving.
- Loose, shifting, or hollow-sounding tiles
- Grout lines that crack or fall out repeatedly
- Caulk that peels, darkens, or grows mildew soon after replacement
- A musty or earthy odor that never fully clears
- Discolored, bubbling, or peeling paint on adjacent walls
- Soft, spongy, or springy flooring at the base of the shower
- Stains on the ceiling of the room directly below the bathroom
- An unexplained rise in your water bill

Why do loose tiles and failing caulk mean a hidden leak?
Loose tiles and repeatedly failing caulk mean the material behind the tile has absorbed water and is no longer a stable, dry surface for adhesion. Tile is set on backer board or drywall with mortar; when a pipe leaks behind that layer, the substrate swells, softens, and loses its bond, so tiles shift and caulk can no longer grip a solid edge.
Caulk failure is often the first visible clue. When the joint between the tub or shower pan and the wall stays chronically wet from behind, fresh caulk will not cure or adhere properly and quickly peels, cracks, or turns black with mildew. If you have re-caulked the same seam two or three times in a year, the problem is almost never the caulk itself—it is moisture trapped in the wall pushing outward.
Hollow-sounding tiles tell the same story. Tap a healthy tile and you hear a solid click; tap a tile over saturated, delaminated backer board and you hear a dull, empty thud. That hollow sound marks the area where the mortar has released from a wet, deteriorating substrate—a strong indicator that a supply line, drain, or valve behind it is leaking.
How does a moisture meter confirm a leak behind the shower?
A moisture meter confirms a leak by measuring how much water is present in a wall material and comparing it to a known dry reference in the same home. On the wood-moisture-equivalent scale most meters use, dry framing lumber typically reads in the single digits to low teens, and dry drywall reads well below that. Readings of 20%, 30%, or higher in the wall beside a shower point to active water intrusion rather than normal bathroom humidity—especially when a comparison wall elsewhere in the house reads dry.
Technicians use two meter types together. A non-invasive pinless meter scans the surface and maps where moisture concentrates without damaging the wall, and a pin-type meter drives two probes into the material to read moisture content at a specific depth. Reading the wet zone and then a dry reference zone a few feet away produces a clear contrast that separates a real leak from surface condensation.
At Restoration Doctor, this diagnosis follows the ANSI/IICRC S500 standard for professional water damage restoration. We document readings with daily moisture logs and CompanyCam photos, then trace the wet trail back to its source—so we are not guessing at where to open the wall. That mapping step prevents unnecessary demolition and gives you a defensible record of the damage from day one.
| Material / Location | Dry reference reading | Reading that suggests a leak |
|---|---|---|
| Drywall (adjacent wall) | Low single digits to ~12% | Above ~17%, or rising toward saturation |
| Wood framing / studs | 6–15% | Above 20% |
| Cement backer board | Low, stable scan matching a dry reference wall | Elevated, saturated scan versus the reference |
| Subfloor near shower base | 6–15% | Above 20%, or spongy to the touch |

What is the difference between a shower leak and normal bathroom moisture?
The difference is persistence and location: normal bathroom moisture is surface condensation that appears during a shower and dries within an hour or two, while a pipe leak keeps materials wet continuously—even days after the bathroom has been unused. If a wall still reads high moisture 48 hours after anyone showered, humidity is not the explanation.
Condensation collects on cool surfaces like mirrors, the outside of the toilet tank, and the upper tile near the ceiling, and it clears with ventilation. Leak moisture, by contrast, tends to concentrate low—at the base of the wall, along the shower pan seam, and in the floor—because gravity pulls escaping water down inside the cavity.
Another tell is odor. Everyday humidity smells like nothing once the room ventilates, but a hidden leak breeds bacteria and mold in dark, wet framing, producing that stubborn musty smell. When a musty odor pairs with any of the structural signs above, treat it as a leak until a moisture inspection proves otherwise.
How quickly can a hidden shower leak cause mold and structural damage?
Mold can begin growing on wet organic materials—paper-faced drywall, wood framing, and the backing behind tile—within 24 to 72 hours of sustained moisture. A hidden shower leak provides exactly the dark, continuously damp environment mold needs, which is why these leaks are among the most common causes of concealed bathroom mold we find.
Structural damage follows on a slower but serious timeline. Over weeks, saturated backer board crumbles, wood studs and subfloor begin to rot and lose load capacity, and the tile field detaches in sheets. What could have been a targeted dry-out becomes a full wall or floor rebuild.
This is why speed matters more than almost anything else with a suspected leak. Restoration Doctor maintains 24/7 emergency response across the Virginia, Maryland, and Washington, D.C. area, because the number of hours a wall stays wet directly determines whether you face drying and resealing or demolition and mold remediation.
- 24–72 hours: mold spores can germinate on wet drywall and framing
- 3–7 days: musty odor becomes noticeable, paint bubbles, tiles loosen
- 2–4 weeks: backer board deteriorates and wood begins to rot
- 1 month+: structural framing weakens, tile field delaminates, mold spreads through the cavity

What should you do first if you suspect a pipe leak behind the shower?
Your first step is to stop using the shower and shut off the water to it—either the local fixture shutoff or the main supply—so you stop feeding the leak. Then reduce the moisture load by running the bathroom exhaust fan, opening a window, and wiping down standing water so the wall is not soaking further while you arrange an inspection.
Do not immediately tear out tile or drywall yourself. Uncontrolled demolition can spread mold spores, release trapped water into adjacent rooms, and destroy the documentation an insurer needs to evaluate the loss. Instead, photograph the visible signs—loose tiles, cracked caulk, stains—and note when you first saw them.
Then call a licensed restoration company for a proper moisture inspection. A professional will confirm the leak with meters, locate the source, and build a controlled drying and repair plan. If you are dealing with active pooling water or ceiling staining below the bathroom, treat it as an emergency and call our 24/7 line at 1-888-293-5663.
- Shut off the shower's water supply or the home's main valve
- Stop using the fixture until it is inspected
- Run the exhaust fan and ventilate the room
- Photograph every visible sign for your records
- Avoid DIY demolition that can spread mold or destroy evidence
- Call for a professional moisture inspection—24/7 if water is active
Will insurance cover water damage from a shower pipe leak?
Homeowners insurance often covers sudden and accidental water damage from a pipe leak, but typically not damage attributed to long-term neglect or a maintenance issue the carrier decides you should have caught. Because a slow shower-wall leak sits in that gray area, thorough documentation is usually what determines whether a claim is approved.
The homeowners who fare best are those with a clear evidence trail: dated moisture readings, photos of the source, and a professional scope of the damage. Restoration Doctor builds that carrier-ready claim file for you—an Xactimate scope, CompanyCam photo documentation, and daily moisture logs—so your loss is presented accurately and completely.
Importantly, we work for you, not your insurance company. We bill you, the homeowner, directly and hand you the documentation to submit to your carrier. That keeps us accountable to restoring your home correctly rather than to an adjuster's budget, and you can learn more about how we support the process on our insurance claims page.

How do professionals repair a leak behind a tile shower wall?
Professionals repair a shower-wall leak in a controlled sequence: confirm and locate the leak with moisture meters, contain the area to prevent mold spread, remove only the affected tile and saturated backer board, repair the failed pipe or connection, dry the cavity to a verified drying goal, then rebuild the substrate, waterproofing, and tile. Skipping the drying-to-goal step is the most common reason a repaired shower leaks or molds again.
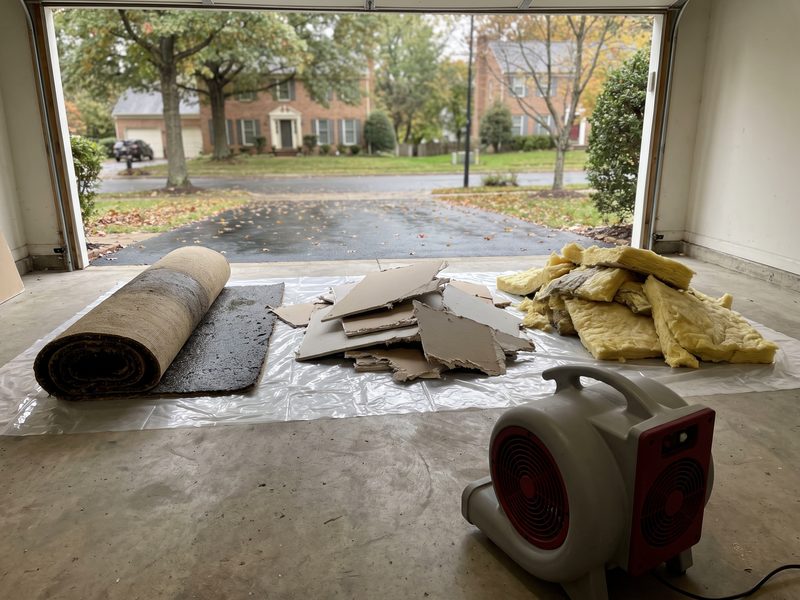
The dry-out itself is guided by psychrometry—managing air temperature, humidity, and airflow to pull moisture out of materials. Air movers and dehumidifiers run until framing and substrate return to the documented dry standard established from unaffected reference materials, not just until surfaces feel dry to the touch. Most structural dry-outs take roughly three to five days and are monitored with daily moisture readings until verified dry.
If mold is already present, remediation follows the ANSI/IICRC S520 standard, with containment and engineering controls scaled to the level of contamination—up to full Condition 3 protocols where actual growth has spread through the cavity. Only after the cavity is dry and clean do we restore backer board, waterproofing, and tile, so the wall is rebuilt on a sound, dry foundation. You can see the full scope of this work on our water damage restoration and mold remediation pages.