Water Damaged Ceiling Collapse: Signs, Timeline and What to Do

BYSteve Jafari, General ManagerNORTHERN VIRGINIA, MARYLAND & D.C.

Yes, a water damaged ceiling can collapse, and a heavy leak can bring one down within hours. Water pooling above the drywall adds weight the panel was never sized to carry while the wet gypsum loses strength, so treat any sag, bulge or drip as imminent and clear the room. Shut the water off, cut power to that room if water is near a fixture, then drain the bulge into a bucket only if you can reach it safely from the side.
Call 1-888-29-FLOODCan a water damaged ceiling collapse?
Yes. A water damaged ceiling can collapse, and a severe leak can bring one down within hours. Water pooling above the drywall adds weight the panel was never designed to carry, while the wet gypsum and its paper facing lose strength. Treat any sag, bulge, soft spot or active drip as an imminent collapse and clear the room.
Water is heavy. It runs about 62 pounds per cubic foot according to the USGS, and a drywall panel spanning between joists was sized for its own weight and a light fixture, not for standing water. As the panel absorbs that water, the gypsum core softens and the paper facing gives up. The load goes up at the same moment the strength goes down, which is why a ceiling that looked fine yesterday can hang in a taut dome today.
One caveat matters more than the rest. Water traveling through a ceiling cavity reaches wiring, junction boxes and recessed lights, so if the bulge or the drip sits anywhere near a fixture, cut the breaker for that room before you go near it. The sections below give you the warning signs in order of severity, then the honest answer on how long a wet ceiling holds.

What causes a water damaged ceiling collapse?
A water damaged ceiling collapses when water pools above the drywall faster than it can escape, adding weight the ceiling was never built to carry. The panel was sized for its own weight and a light fixture, not for standing water, so a steady leak that gathers above one section can push it past its limit in hours.
The water almost always comes from something above the ceiling. Gravity carries it down until it hits the top of your ceiling drywall, where it spreads across the panel and looks for the lowest point to gather. The sources below account for most of the ceiling leaks we are called to in Northern Virginia homes.
As the drywall absorbs moisture, its paper facing and gypsum core lose structural strength. A brown stain becomes a soft spot, the soft spot begins to sag, then the water collects in one bulging pocket. That bulge is the danger zone. The category of the water matters here too. Under the ANSI/IICRC S500 standard we follow, clean supply-line water starts as Category 1, but water that has traveled through a ceiling cavity, soaked through insulation or come from a toilet overflow can deteriorate to Category 2 or 3. The category decides how the material must be handled and whether the ceiling can be dried in place or has to be removed.
- Plumbing above the ceiling: a burst or leaking supply line, or a failed drain or trap under an upstairs bathroom.
- An overflowing tub, shower pan or toilet on the floor above.
- A roof leak, or failed flashing around a chimney, a vent or a roof valley.
- An HVAC condensate line or drain pan that has backed up into the ceiling.
- Wet attic insulation, which holds water like a sponge and keeps releasing it into the drywall long after the leak itself stops.
- An ice dam that forces meltwater back up under the shingles in winter.
What are the warning signs a water damaged ceiling is about to collapse?
If your ceiling is actively bulging, sagging more than an inch or dripping in more than one place, treat it as an imminent collapse and get everyone out from underneath it now. You do not need to be certain. With a ceiling holding water, it is far safer to assume it will fail than to wait and find out.
Use the quick self-check below to gauge your risk level. The single most important sign is a bubble or dome: a taut, downward-bulging pocket in painted drywall is trapped water, and it is essentially a water balloon over your head. It can hold gallons, and when the paper tears, all of it comes down at once along with wet gypsum, soaked insulation and whatever was sitting on top of the ceiling.
Check the ceiling from a distance first, then approach only if it looks stable. Listen as well as look. Creaking, ticking or cracking from inside the cavity is the one warning sign you can pick up in the dark from the next room, and it usually means the drywall is still moving under a load that is still growing. A leak that has not been shut off keeps raising the risk level, so a sound that gets louder or more frequent is your signal to leave the room.
- Low risk: a faint, dry, ring-shaped stain that is not spreading and not soft to a gentle touch.
- Moderate risk: an expanding damp stain, bubbling or peeling paint, or a musty smell. Water is present but not yet pooling.
- High risk: a visible sag, a soft or spongy area, active dripping, or cracks radiating across the drywall.
- Creaking, ticking or cracking from inside the ceiling cavity: the drywall is likely moving under a growing load, and this is the one sign you can catch from another room or in the dark.
- Imminent collapse: a taut, hanging bubble or dome; multiple drip points; audible creaking; or debris starting to flake down.
- Any risk level near a light fixture, ceiling fan or electrical box is more dangerous, because water and electricity together raise the stakes immediately.
| Sign | What it means | What to do |
|---|---|---|
| Dry, stable stain | Past leak, likely resolved | Monitor; have the source verified |
| Spreading damp stain | Active leak above | Find and stop the source; call for inspection |
| Bubble or dome | Pooled water trapped in drywall | Clear area, controlled drain, call professionals |
| Creaking or cracking overhead | Drywall moving under a growing load | Leave the room now, call emergency response |
| Sagging or soft drywall | Structural failure beginning | Evacuate the space, call emergency response |
| Active dripping + cracks | Collapse likely imminent | Stay clear, kill nearby power if safe, call now |

How long does it take for a water damaged ceiling to collapse?
There is no fixed clock. A heavy active leak can take a ceiling down in hours once water starts pooling above one panel, while a slow drip can stain and spread for weeks before anything sags. The timeline is set by how fast the water arrives and how much of it the assembly is already holding, not by a number anyone can quote you over the phone.
Four things move that clock, and you can judge three of them from the floor.
A second deadline runs at the same time, and it does not wait for the ceiling to fail. The EPA's guidance is to dry water damaged areas and items within 24 to 48 hours to prevent mold growth, and the CDC gives the same window for drying out a home after a flood. So a ceiling that never sags is still on a clock once the cavity above it is wet.
- The material. Drywall softens and loses strength as it absorbs water, so it fails relatively early. Plaster resists at the surface for longer but can pull away from the lath in one sheet.
- The age and leak history of the home. A ceiling that has been wet before, then patched and repainted, has already given up some strength, and old fasteners let go sooner.
- The volume and rate of the water arriving. A pinhole drip and an open supply line are not the same event, and at about 62 pounds per cubic foot a pocket that keeps filling adds load fast.
- Whether the cavity has airflow. A vented attic above a ceiling dries far better than a sealed joist bay between two floors, where the water has nowhere to go but into the drywall.
Can I safely drain a ceiling water pocket myself?
Yes. Draining the water pocket on your own terms is usually safer than letting it burst, and it is the single most useful thing a homeowner can do before help arrives. The goal of the controlled drain is simple: release the water in a slow, aimed stream into a bucket instead of letting the drywall tear and dump everything at once.
The principle is that a bubble will fail eventually, and an uncontrolled failure sends water, sodden drywall and insulation across your floor and furniture in an instant. A small, deliberate puncture at the lowest point of the bulge lets you decide when and where that water goes. Only attempt this if you can reach the bubble safely from a stable ladder, the area below is cleared, and no live electrical fixture is in or near the pooled water. If the bulge sits against a light fixture or the ceiling is already sagging broadly, stay out from under it entirely and wait for professionals.
- Clear the room: move furniture and electronics out from under the bulge, roll back any rug, and put down a tarp or towels.
- Kill the power to that room at the breaker if the water is anywhere near a light or fixture.
- Position a large bucket (or several) directly under the lowest point of the bubble.
- Stand to the side on a stable ladder, never directly beneath the bulge, and wear eye protection.
- Using a screwdriver or awl, make one small puncture at the very lowest point of the sag so water drains straight down into the bucket.
- Let it drain fully; make a second small hole higher up if the flow slows and water is still trapped.
- Do not slash a big opening. You want a controlled stream, not a release of the whole pocket.
| Factor | Controlled drain | Uncontrolled collapse |
|---|---|---|
| Timing | You choose when | Sudden, unpredictable |
| Water spread | Contained to a bucket | Sprayed across the room |
| Injury risk | Low if area is cleared | High, from falling debris and water |
| Cleanup | Minimal | Major, including insulation and gypsum |
| Damage to contents | Preventable | Often significant |

What should I do immediately when a ceiling is caving in or dripping?
A ceiling that is caving in gives you very little time, so work in a fixed order. Get people and pets out from under it first. Then kill the power to that room at the breaker if water is anywhere near a light, a fan or a junction box. Only after that go and stop the water at its source, either at the fixture or at the home's main valve.
Electricity is the hazard homeowners underestimate. Water traveling through a ceiling cavity reaches wiring, junction boxes and recessed lights, and it does not have to be visibly dripping on a fixture to be in contact with one. Ready.gov's flood safety guidance is blunt about it: do not touch electrical equipment if it is wet or if you are standing in water, and turn off the electricity to prevent electric shock if it is safe to do so.
With the power off and the water stopped, photograph everything before you touch it, because that is what your claim file is built from. Then perform the controlled drain if you can reach the water pocket safely from the side, and call for professional help.
Speed genuinely matters. Restoration Doctor serves the Virginia, Maryland, and Washington, D.C. tri-state area 24/7, and across the Northern Virginia core our response commitment is on-site within 60 minutes, with a median arrival of 47 minutes. The sooner the source is found and the cavity is dried, the less of your ceiling and structure has to be removed. If water is actively coming through your ceiling, our 24/7 emergency water damage team is the fastest path to stopping the damage.
- Evacuate the area directly beneath the ceiling.
- Cut power to that room at the breaker if water is near a light, a fan or a junction box.
- Shut off the water source or the home's main valve.
- Move or cover valuables and furniture.
- Photograph and video the damage for your claim file.
- Perform the controlled drain only if it is safe to reach.
- Call 1-888-293-5663 for 24/7 emergency response.
What are the real dangers of a collapsed water damaged ceiling?
The obvious danger is impact injury. A saturated section of ceiling can weigh far more than dry drywall, and it often falls with light fixtures, loose fasteners and debris attached. The hazards that follow a collapse are just as serious: electrical shock from wet wiring, slip risks from standing water and hidden mold growth in the cavity above.
Mold is the slow-burn threat. The EPA's guidance is to dry water damaged areas and items within 24 to 48 hours to prevent mold growth, and the CDC gives the same window for drying out a home after a flood. A ceiling cavity is dark and still, and it is packed with paper-faced drywall and insulation, so a cavity left wet past that window is at risk for mold. The CDC is careful about what that means for the people in the house: exposure to damp and moldy environments may cause a variety of health effects, or none at all. When remediation is needed, we work to the ANSI/IICRC S520 standard, the published procedural standard for the remediation of mold damaged structures and contents. That is why patching a stained ceiling without drying the cavity behind it so often ends in a musty smell weeks later.
There is also the question of what the water is. Water that overflowed from a toilet bowl or sat stagnant in a cavity for days is not clean water. It may carry contaminants that require Category 3 protocols to clean up safely, meaning full containment, protective equipment and removal of porous materials. A homeowner cannot tell the category by looking, which is one more reason a saturated ceiling should be assessed rather than wiped down and painted over.
Finally, do not overlook what sits above the ceiling. Attic insulation holds water like a sponge and keeps the framing wet long after the drywall dries, and wet blown-in insulation loses much of its insulating value even once it dries. A proper assessment covers the whole assembly, meaning the drywall, the insulation, the framing and the wiring, not just the visible surface.

How do professionals repair a water damaged ceiling?
Professionals repair a water damaged ceiling by finding and stopping the water source first, then drying the entire cavity to a verified drying goal before any drywall goes back up. Skipping straight to a patch is the most common mistake, because it seals moisture and mold behind fresh paint.
At Restoration Doctor, the process follows the ANSI/IICRC S500 standard, which describes the procedures to be followed and the precautions to be taken when performing water damage restoration in residential, commercial and institutional buildings. We use moisture meters and thermal imaging to map how far the water has traveled, which is almost always wider than the visible stain, and we take daily moisture readings so drying is measured rather than guessed. We remove only the material that cannot be saved, set up controlled air movement and dehumidification based on psychrometric calculations, then monitor progress daily until the structure meets a documented drying goal.
A typical structural dry-out runs three to five days with daily monitoring, though a small isolated ceiling leak may dry faster and a large multi-room event can take longer. Once the cavity is verified dry, drywall is replaced, finished, primed with a stain-blocking sealer, and painted to match. You can read more about our full process on our water damage restoration page, and our guide to the cost of fixing a water damaged ceiling walks through what drives the final number.
- Locate and stop the water source.
- Map moisture with meters and thermal imaging.
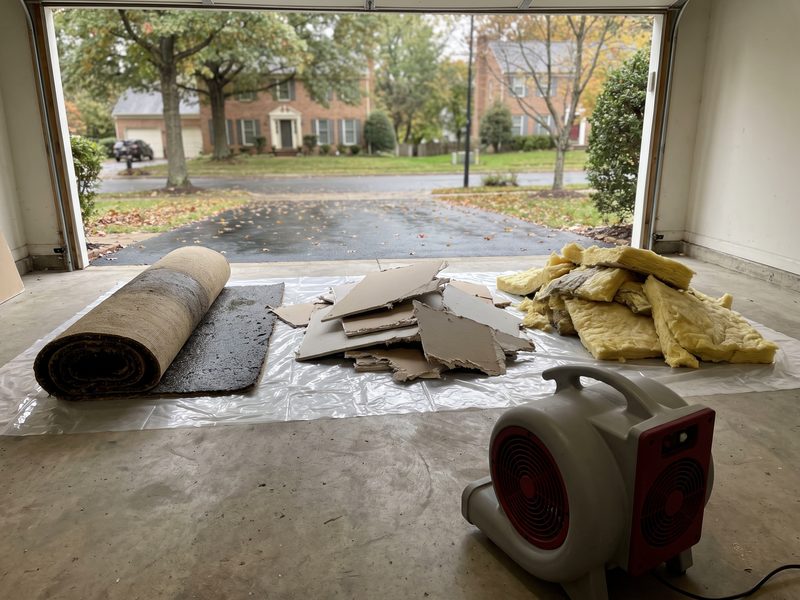
- Remove unsalvageable, contaminated, or structurally failed drywall and insulation.
- Dry the cavity and framing with air movers and dehumidifiers to a verified drying goal.
- Log daily moisture readings until the drying goal is met.
- Address any mold per ANSI/IICRC S520 before closing the ceiling.
- Rebuild the ceiling, then seal and finish it.
Will insurance cover a water damaged ceiling collapse?
Most homeowner policies cover a ceiling collapse when it results from a sudden, accidental event like a burst pipe or an overflowing appliance, while damage from long-term neglect or a slow, unaddressed leak is often excluded. Coverage depends on your specific policy and the cause of the loss, so documentation is everything.
The outcome of a claim usually comes down to how well the loss is documented, and that is where we work for you rather than for your insurance company. We bill you the homeowner directly, and we hand you a carrier-ready claim file: an Xactimate scope of the work, CompanyCam photo documentation and the daily moisture logs that prove the drying was done correctly. We do not invoice your carrier. We give you the evidence to make your claim as strong as possible.
To protect a potential claim, photograph the bulge and any dripping before you drain it. Keep records of when you noticed the damage and what you did about it, and save any failed part such as a burst supply line, because adjusters often want to see the physical cause. You can learn more about how we support claims on our insurance claims page.
How can I prevent a water damaged ceiling from collapsing again?
The best prevention is stopping the leak at its source and catching moisture early, because a ceiling collapse is almost never sudden. It is the final stage of a leak that had warning signs for days or weeks. Regular attention to the plumbing, the roofing and the HVAC systems above your ceilings lowers your risk sharply.
Pay special attention to ceilings directly below bathrooms, laundry rooms and kitchens, and to any ceiling along the roofline, since those are where most ceiling leaks originate. If you ever see a stain reappear after a repair, treat it as an active leak rather than a cosmetic issue, and have the cavity checked with a moisture meter before anyone repaints it.
It also pays to make the whole household leak-ready. Everyone old enough to turn a valve should know where the main water shutoff is, because the difference between a five-minute leak and a five-hour leak is often the difference between a damp stain and a collapsed ceiling.
If you want to read the source material yourself, everything cited on this page is public. The standards below define the restoration work; the EPA and CDC pages cover the drying window and the health side, and the USGS page is where the weight of water comes from.
- Inspect supply lines and shutoff valves under upstairs sinks and toilets twice a year.
- Replace rubber washing-machine and toilet supply hoses with braided stainless steel.
- Check the roof and flashing after major storms and clear gutters seasonally.
- Keep HVAC condensate lines clear so they don't overflow into the ceiling.
- Address any ceiling stain immediately, and never just paint over it.
- Know where your main water shutoff is so you can act in seconds.
- Consider leak-detection sensors near water heaters, washing machines and upstairs bathrooms.
- Sources used in this guide:
- US EPA, A Brief Guide to Mold, Moisture and Your Home.
- CDC, Mold, on mold and your health.
- USGS Water Science School, Water Density, on the density and weight of water.
- Ready.gov, Floods, on flood safety and electrical hazards.
- IICRC, S500, the standard for professional water damage restoration.
- IICRC, S520, the standard for mold remediation.