Wet Insulation Replace After Water Damage: A Homeowner's Guide

BYSteve Jafari, General ManagerNORTHERN VIRGINIA, MARYLAND & D.C.

In most cases you should replace wet insulation after water damage rather than try to dry it — saturated fiberglass and cellulose hold water against framing, lose their R-value permanently, and can support mold growth within 24 to 48 hours. Drying the drywall alone is not enough, because the insulation behind it stays wet and hidden inside the cavity. Any insulation touched by Category 2 or Category 3 water must be removed regardless of material type. The safe approach is to open the wall cavity, remove and discard contaminated insulation, dry the framing to a verified drying goal with documented moisture readings, and only then re-insulate and rebuild.
Call 1-888-29-FLOODDo you need to replace wet insulation after water damage?
Yes — in most water-damage situations, wet insulation should be replaced, not dried in place. Fiberglass batts and blown-in cellulose act like a sponge inside your wall and ceiling cavities: once saturated, they hold water against the framing, compress permanently, lose most of their insulating value, and become a long-lasting moisture reservoir that keeps the cavity wet. Replacing wet insulation after water damage is one of the most commonly skipped steps when homeowners focus only on the visible drywall — and it is often the reason a "repaired" wall develops mold months later.
The important distinction is between clean-water exposure and contaminated-water exposure. Under the ANSI/IICRC S500 Standard for Professional Water Damage Restoration, water is graded into three categories, and the category largely drives whether a material can be salvaged. Category 1 is water from a sanitary source, such as a clean supply line. Category 2 (gray water) carries significant contamination, such as discharge from a dishwasher or washing machine. Category 3 (black water) is grossly contaminated — sewage backups, rising floodwater, and similar sources. Insulation exposed to Category 2 or Category 3 water is treated as contaminated and must be removed and discarded; no amount of drying makes it safe to keep. Also keep in mind that water degrades over time: clean water that sits in a warm, dirty cavity can deteriorate to a higher category.
Even with clean Category 1 water, saturated batt and loose-fill insulation rarely dries fast enough inside a concealed cavity to beat mold growth, and it almost never returns to its original loft or R-value. That is why restoration professionals treat wet insulation as a removal item far more often than a dry-and-save item. If your home has water inside the walls right now, Restoration Doctor provides 24/7 emergency water damage response throughout the Virginia, Maryland, and Washington, D.C. tri-state area — the sooner the cavity is opened and assessed, the more of the surrounding structure can usually be saved.

Why can't you just dry the drywall and leave the insulation?
You can't just dry the drywall because the insulation behind it stays wet, sealed inside a cavity where airflow can't reach it. Drywall is porous and dries relatively quickly on its exposed face, so a moisture meter pressed against the wall surface can read "dry" while the fiberglass or cellulose two inches behind it is still saturated. This is the hidden culprit behind many post-flood mold problems: the wall looks fixed, but the cavity never actually dried.
Wet insulation also works against the drying equipment you're paying to run. Air movers and dehumidifiers can only remove moisture that evaporates from surfaces the airflow can reach. When soaked insulation is packed against the back of the drywall and fills the stud bays, it slows evaporation dramatically and re-wets the drywall from behind, extending dry times and increasing the risk of secondary damage such as swelling, delamination, and microbial growth. Even a well-equipped structural dry-out that would normally finish in a matter of days can stall out — or pass on the surface while failing inside the cavity — when saturated insulation is left in place.
There's also a thermal issue. Compressed, waterlogged fiberglass and cellulose lose most of their R-value permanently, so even if the material somehow dried without growing mold, your walls would no longer insulate the way they should. That means higher energy bills, cold spots, and condensation-prone surfaces going forward. Between the mold risk, the drying interference, and the permanently lost performance, leaving wet insulation in place is almost never worth the small savings of not replacing it.
- Surface moisture meters can read "dry" on drywall while the cavity behind it stays saturated.
- Wet insulation re-wets drywall from behind and slows the entire structural dry-out.
- Waterlogged fiberglass and cellulose lose R-value permanently and won't recover their loft.
- Concealed cavities have almost no airflow, so hidden insulation is the last thing to dry.
What types of insulation can be saved and what must be replaced?
Whether insulation can be saved depends on the material and the water category. Closed-cell spray foam and rigid foam board are non-absorptive, so they can often be cleaned and dried in place if the water was clean. Fiberglass batts and cellulose, on the other hand, almost always need replacement once they're saturated — EPA's water-damage cleanup table lists fiberglass insulation as discard and replace. Cellulose is the most fragile of all because it's made of treated recycled paper — it clumps, mats, compacts, and breaks down when wet, and it can never be restored to its original form or performance. Mineral wool resists water better than fiberglass, but once it's saturated inside a closed cavity it usually faces the same drying-speed problem.
The table below is a general guide, not a substitute for an on-site assessment. The final call always factors in how long the material was wet, the water category, whether mold growth is already present, and whether the material can realistically be dried before microbial growth begins. When the answer is uncertain under IICRC S500, the safe and defensible decision is removal.
One rule overrides material type entirely: any insulation exposed to Category 2 or Category 3 water is removed regardless of what it's made of, following contaminated-water protocols and, for Category 3 losses like sewage backups, appropriate biohazard handling and disposal.
| Insulation type | Clean (Cat 1) water | Contaminated (Cat 2/3) water |
|---|---|---|
| Fiberglass batts | Usually replace if saturated | Always replace |
| Blown-in cellulose | Almost always replace | Always replace |
| Mineral / rock wool | Sometimes salvageable if dried fast | Always replace |
| Closed-cell spray foam | Often clean and dry in place | Assess; often replace surrounding materials |
| Rigid foam board | Often clean and dry in place | Assess; often replace surrounding materials |

How do you know if the insulation behind your walls is wet?
You confirm wet insulation through a combination of moisture-meter readings, thermal imaging, and — where those tools point to saturation — a small inspection opening in the wall. Because insulation hides inside stud bays and ceiling joist cavities, you usually can't confirm saturation by looking at the drywall alone. The reliable approach is to map moisture non-invasively first, then verify directly before deciding how much to remove.
Professional restorers use pin-type and pinless (non-invasive) moisture meters to map how far moisture has traveled across the wall, thermal (infrared) cameras to reveal the cooler temperature patterns that evaporating moisture creates behind the surface, and psychrometric readings — temperature and relative humidity — to understand the drying environment. It's worth noting that a thermal camera doesn't see water directly; it sees temperature differences, which is why suspect areas are always confirmed with a moisture meter. Where readings suggest cavity saturation, a small, clean cut lets the technician inspect the insulation's condition and check for mold growth before scoping the removal.
There are also warning signs a homeowner can spot without any equipment. Any of the following after a leak or flood strongly suggests the insulation may still be holding water.
- Drywall that stays cool, soft, or discolored days after the initial event.
- A persistent musty or earthy odor near the affected wall.
- Sagging drywall, bubbling paint, or peeling wallpaper.
- Water stains that spread or darken over several days.
- Higher-than-normal humidity in the room that won't come down.
- Visible mold speckling near baseboards, outlets, or wall seams.
How long before wet insulation grows mold?
Mold can begin colonizing wet insulation and the surrounding framing within 24 to 48 hours of exposure under favorable conditions, the window EPA's mold guidance sets for drying wet materials. Cellulose insulation is especially vulnerable because it's organic — paper-based — and provides both food and moisture for mold. Fiberglass itself isn't a food source, but the dust, dirt, and kraft-paper facing on it, plus the wood framing and drywall paper it touches, readily support growth once they stay damp.
That short window is exactly why speed matters, and why "we'll let it dry out over the next couple of weeks" is a losing strategy for concealed insulation. Inside a sealed wall cavity with poor airflow and trapped humidity, conditions stay favorable for mold far longer than they would on an open, ventilated surface. Once mold is established, the job shifts from water restoration under S500 to mold remediation under the ANSI/IICRC S520 Standard for Professional Mold Remediation, which calls for engineering controls such as containment, controlled removal of contaminated materials, and verification that the remediation succeeded before rebuild.
If you already smell mustiness, see discoloration, or know the water has been sitting for more than a day or two, treat the area as a potential mold situation and avoid disturbing it — tearing into moldy insulation without containment spreads spores through the house. Our mold remediation team can assess whether growth is present and contain it properly, and our water damage restoration crews are built to respond inside that critical first-48-hour window. If you want a deeper look at the timeline, see our guide to how fast mold grows after water damage.

What is the process to remove and replace wet insulation?
The process is: assess and contain, remove wet insulation and affected drywall, clean and dry the framing to a verified drying goal, confirm and document that it's dry, and only then re-insulate and rebuild. This sequence follows the core IICRC S500 principle that you cannot rebuild over a wet or contaminated cavity — the structure must reach a documented drying goal, established against a dry standard, before anything is closed back up.
Skipping the verification step is the most common and most expensive mistake. A wall that's re-insulated and re-drywalled while the framing is still damp simply seals in a moisture problem that resurfaces as mold and odor months later — and then everything has to come apart again. Restoration Doctor documents every stage with daily moisture logs and CompanyCam photos, so there is dated, professional proof that the cavity was actually dry before it was closed. That documentation protects you with your insurance carrier and with any future buyer of the home.
Here is what a properly sequenced wet-insulation replacement looks like from start to finish.
| Step | What happens |
|---|---|
| 1. Assess | Identify the water category, map moisture with meters and thermal imaging, and check for existing mold growth. |
| 2. Contain | Set up containment and PPE — especially for Category 2/3 water or suspected mold, per S520 where applicable. |
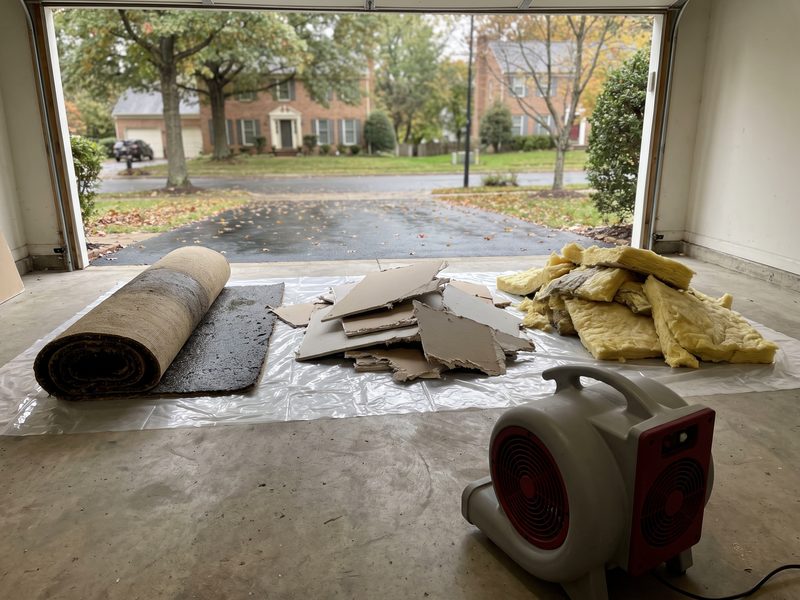
| 3. Remove | Cut out saturated insulation and affected drywall; bag and properly dispose of contaminated material. |
| 4. Clean | Clean the framing and cavity surfaces and, where appropriate, apply an antimicrobial treatment. |
| 5. Dry | Run air movers and dehumidifiers, monitored daily until the framing reaches its documented drying goal — typically a few days, depending on saturation and conditions. |
| 6. Verify | Confirm dryness with moisture-meter readings and log the results before closing the wall. |
| 7. Rebuild | Install new insulation, hang and finish drywall, then prime and paint to match. |
How much does it cost to replace wet insulation after water damage?
Wet insulation replacement is usually a line item within a larger water-damage project rather than a standalone price, and costs vary widely with the size of the affected area, the water category, whether mold is present, and how much drywall and framing work is involved. Because every loss is different, any honest number is a range, never a fixed figure — a single wet stud bay behind a laundry room is a modest repair, while a flooded basement or whole-wall saturation across multiple rooms is a much larger scope with demolition, extended drying, and full rebuild.
The biggest cost drivers are the water category (contaminated water requires more removal, PPE, and disposal), the volume of material affected, how accessible the cavity is, and whether mold remediation under S520 is now part of the job. Drying-equipment runtime, the type of replacement insulation you choose, and the drywall finishing and painting needed to restore the wall all factor in as well. For context on the broader project, our breakdown of water damage restoration costs covers how these pieces typically add up.
Rather than quote a misleading flat rate, we provide an itemized, Xactimate-based scope after an on-site assessment so you can see exactly what each line item covers and why. Many homeowners end up filing an insurance claim for this kind of loss, so it's worth understanding how coverage and claims work before you assume you're paying entirely out of pocket.
- Water category — contaminated water raises removal, PPE, and disposal costs.
- Affected area size — a single stud bay versus an entire wall or ceiling.
- Mold presence — triggers containment and S520 remediation steps.
- Cavity access — walls behind cabinets, tile, or finished basements cost more to open.
- Rebuild scope — new insulation plus drywall, texture, primer, and paint.

Does insurance cover wet insulation replacement, and how do claims work?
Most homeowners policies cover wet insulation replacement when the water damage is sudden and accidental — a burst pipe, an appliance supply-line failure, a water heater rupture — while gradual leaks, long-term seepage, and deferred maintenance are commonly excluded. Flood damage from rising water typically requires separate flood insurance, as Virginia's Bureau of Insurance homeowners guide explains. Coverage always depends on your specific policy language and the cause of loss, which is exactly why thorough documentation of what happened and what was damaged is critical to a successful claim.
Here's the part homeowners most often misunderstand: Restoration Doctor works for you, not for your insurance company. We bill you, the homeowner, directly, and we hand you a carrier-ready claim file — a detailed Xactimate scope, CompanyCam photo documentation, and daily moisture logs — so you have the professional evidence carriers expect to see. Because we're not paid by your insurer, our scope and documentation are built around restoring your home correctly, not around minimizing a payout.
That claim file matters especially for concealed damage like wet insulation, because an adjuster can't see inside a closed wall. Dated moisture logs and photos prove the insulation was saturated, prove the cavity was dried to a verified goal before rebuild, and support the full scope of the replacement work. Learn more on our insurance claims page, or call Restoration Doctor (VA Water Damage LLC, 8609 Westwood Center Dr, Ste 110-1062, Vienna, VA 22182) any time at 1-888-293-5663 to start an assessment anywhere in the Virginia, Maryland, and Washington, D.C. tri-state area.